
Z31/rearsuspensionbushings php: Difference between revisions
Site import |
m XenonzcarImporter moved page Sites/Xenonzcar/z31/rearsuspensionbushings php to Z31/rearsuspensionbushings php without leaving a redirect: Flatten Sites/ namespace; provenance preserved via ImportedFrom banner |
(No difference)
| |
Revision as of 06:38, 16 May 2026
Auto-imported article. This page was generated by the Z31 Library import pipeline from forum sources{{#if: | in category {{{category}}} | }}. The text was synthesized by an LLM and has not been hand-verified. Please correct errors and remove this banner once reviewed.
{{#if: | [[Category:Auto-imported — {{{category}}}]] | }}
Z31 Rear Control Arm Bushing Upgrade
WARNING - Do this modification at your own risk. We Are not responsable for any issues of your own doing.
Parts Needed
Complete Bushing Kit: If you want to replace all the bushings on your Z31, you can purchase the complete kit.
Note: Crossmember bushings are not included and are sold separately.
Rear End Rebuild Kit: For those focusing on the rear, you can buy just the rear kit to upgrade all the rear bushings.
Crossmember Bushings: These are available separately, but buying individually is usually more expensive.
- Prothane 142004 Complete Suspension Bushing Kit - Nissan 300ZX 84-89– $200.77 fromProthane Suspension Parts - Prothane Nissan 300ZX Rear End Bushing Rebuild Kit 84-89– $42.92 fromRear Lower Control Arm Bushings - Prothane 14303 Rear Lower Control Arm Bushings– $14.77 fromRear Lower Control Arm Bushings
Tools Needed
- 13mm Wrench
- 14mm Wrench
- 17mm Wrench
- 19mm Wrench
- 12mm Socket
- 13mm Socket
- 14mm Socket
- 15mm Socket
- 17mm Socket
- 22mm Socket
- Ratchet
- Prybar
- Press or Vice
- Dead Blow Hammer
- Jack and Jackstands
- Torch
- Wire wheel and brush
Procedure
Control Arm Removal
- Jack the car up and secure on jack stands.
- Pull the wheels off the rear.
- Remove the brake lines from the control arm to the hard line on each side.
- Remove the rear sway bar (4 bolts). If bushings are worn, replace them now.
- Disconnect the emergency brake cables from the calipers and main cable.
- Remove the lower bolt for the shock absorber.
- Remove the 2 bolts holding the shock absorber mount to the control arm. This will give you better access to the CV Axle to stub axle bolts (6 on non-turbo cars, 4 on turbo cars).
- Now remove the CV axle to stub axle bolts at the control arm (4 on turbo models and 6 on non-turbo models).
- Remove the CV axles from the differential carrier.
- Remove the rear control arms from the cross member: - Each side has one regular bolt/nut and one eccentric bolt/nut.
- Mark the eccentric bolt position with a paint pen before removal for alignment.
- Torque spec: 72–87 ft-lbs
- Each side has one regular bolt/nut and one eccentric bolt/nut.
Bushing Removal
Now comes the fun part—playing with fire!
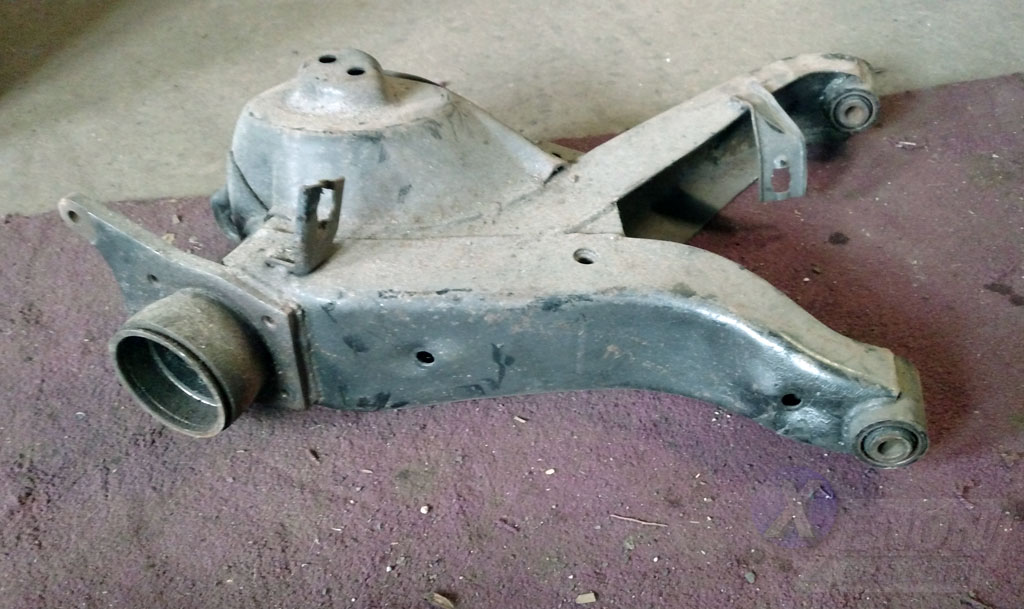
Take the control arm to a safe location where you can burn out the old control arm bushings. This is necessary because you’ll be reusing the metal sleeves that are already inside the current bushings.
What I usually do is heat the bushings until they start to “pop” and you can see red inside the rubber. Then, use an old screwdriver or punch to push on the rubber, exposing more and more of the sleeves until the center sleeve comes out of the bushing.
image: Control Arm Bushing Rubber
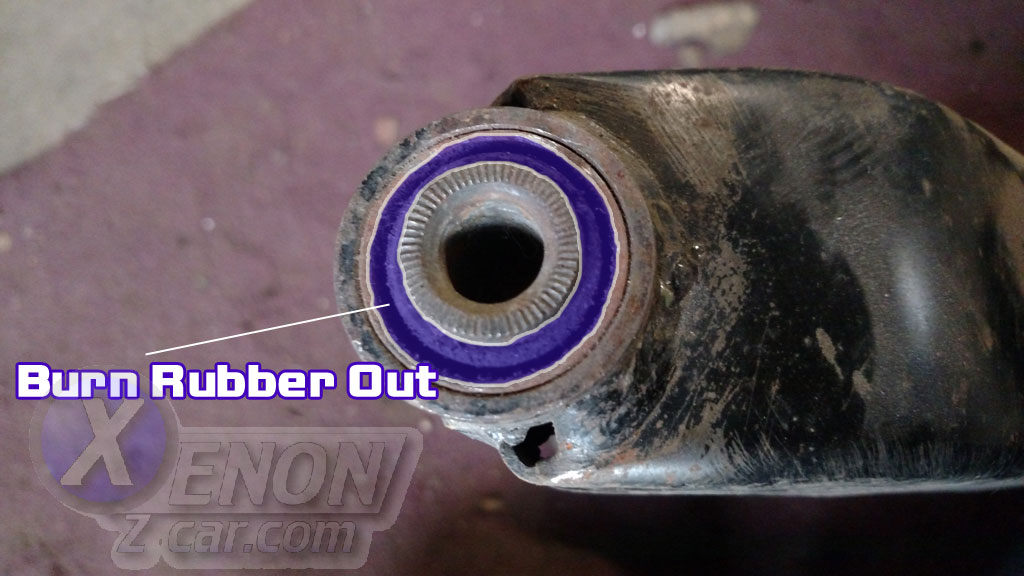
Once the center sleeve comes out, keep pressing the rubber out as much as you can—this will make the next cleaning step much easier.
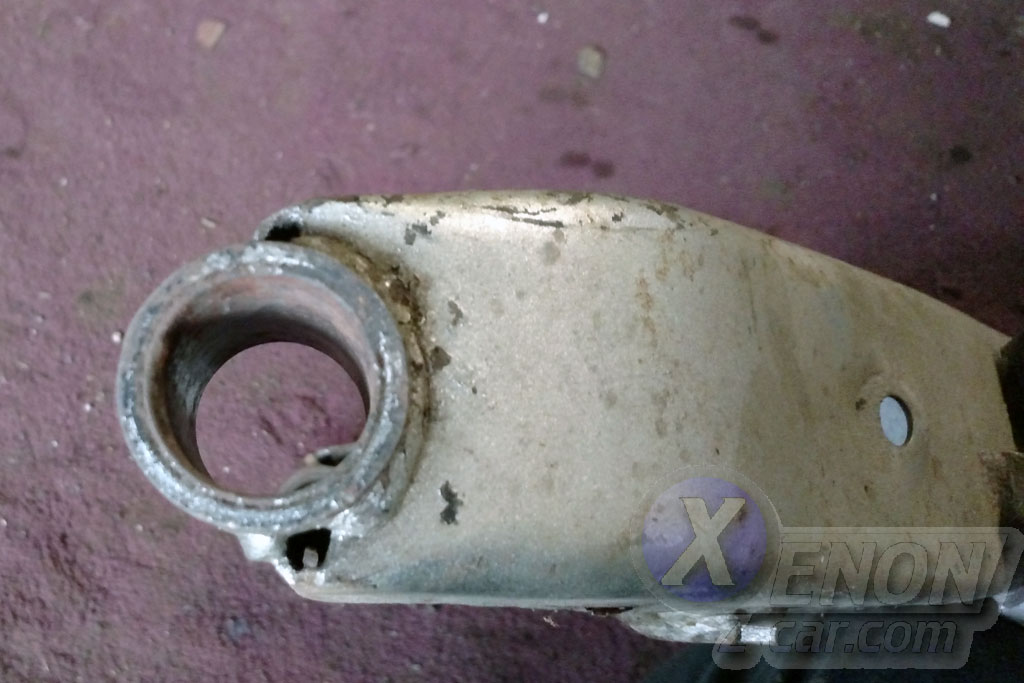
When most of the rubber is gone, use your wire wheel to clean the inner sleeve so there is no more rubber on it. Do the same for the outer sleeve that is still in the control arm.
image: Control Arm Bushing removed
Bushing Installation
Now you can take the cleaned control arm and new bushings over to a vice and start to press them into the control arm with the inner sleeve in place. Tip: Make sure to use plenty of the included grease during this step! It makes installation much easier and prevents the bushings from squeaking while driving.
image: Control Arm Bushing installed
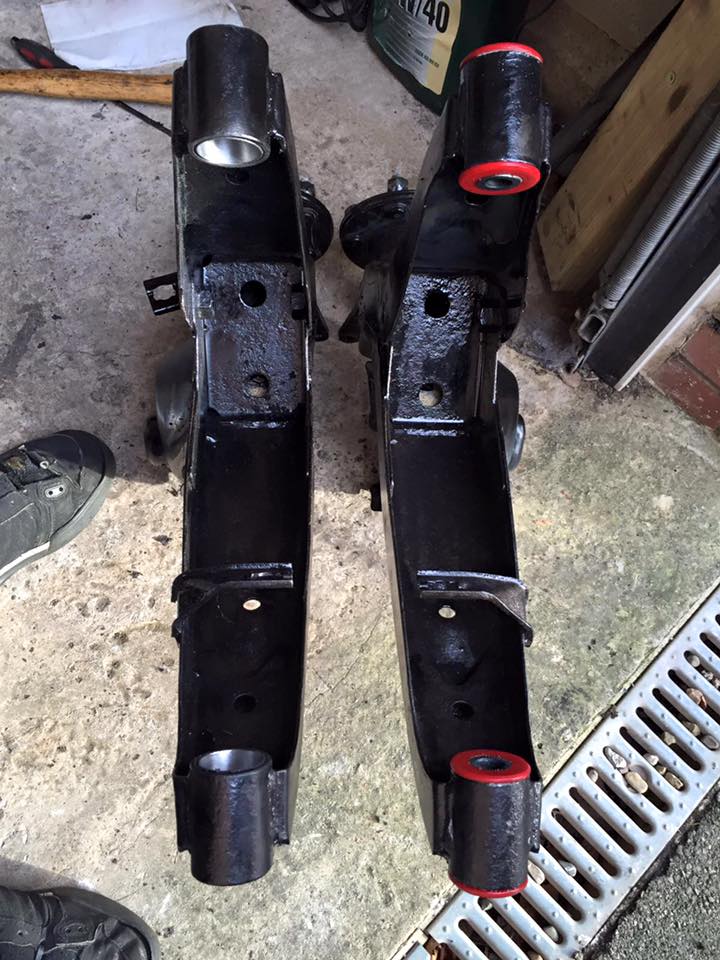
Once the new bushings are pressed in, reassemble the control arm and repeat the process for the other side.