
Z31/Frontendconversion php: Difference between revisions
Site import |
m XenonzcarImporter moved page Sites/Xenonzcar/z31/Frontendconversion php to Z31/Frontendconversion php without leaving a redirect: Flatten Sites/ namespace; provenance preserved via ImportedFrom banner |
(No difference)
| |
Revision as of 06:38, 16 May 2026
Auto-imported article. This page was generated by the Z31 Library import pipeline from forum sources{{#if: | in category {{{category}}} | }}. The text was synthesized by an LLM and has not been hand-verified. Please correct errors and remove this banner once reviewed.
{{#if: | [[Category:Auto-imported — {{{category}}}]] | }}
Z31 Zenki to Kouki 1984-1986 to 1987-1989 Front Body Conversion
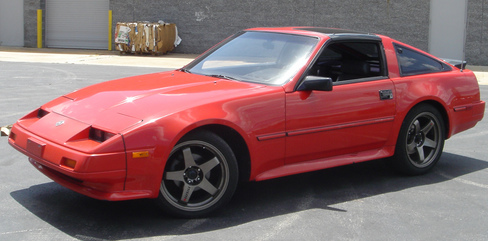
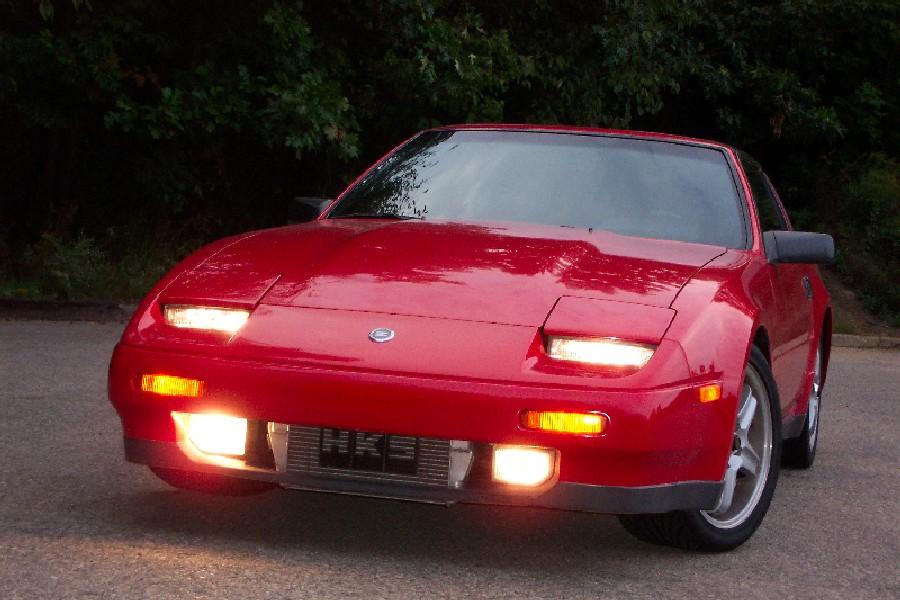
The 300ZX was slightly redesigned for the 1987 model year to boost sales, as the original design "dated quickly." The update included a redesigned nose and hood, larger wheels, and a new tail design. The front became less angular, the bumper extended less under the car, the fog lamps were moved into the bumper, and a wider, replaceable bulb headlamp was used.
In my opinion, this later front end fits the "de-molded" 300ZX better than the original angular nose. Here’s what was required on my 300ZX (built June 1984) to install the later style nose. For example, see the pictures below: the '88 is on the right, the '84 is on the left.
Parts Needed
- Hood
- Bumper cover (the plastic skin)
- Bumper reinforcement (the actual metal bumper)
- Foglamps (if you can find them)
- Headlamp buckets (complete with headlamps, wiring, and covers)
- Hood safety Catch Support
Bumper and Hood Fitment
The hood should bolt on without any problems. I used the hinges from the '87 donor car and they bolted right up; if you're having issues, try those.
As for the bumper, there are two main hurdles that make this a non-bolt-on installation.
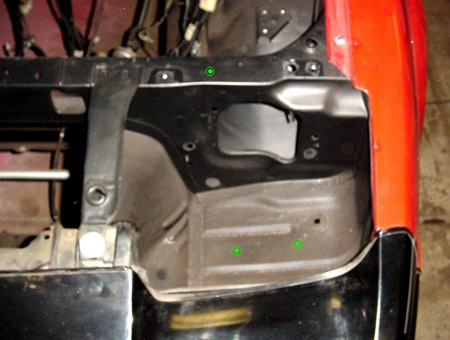
1. Headlamp Bucket Mounting Points
The '87 headlamp buckets use different mounting points than the '84. The approximate location of the different mounting points is shown in green below:
2. Upper Bumper Mount Modification
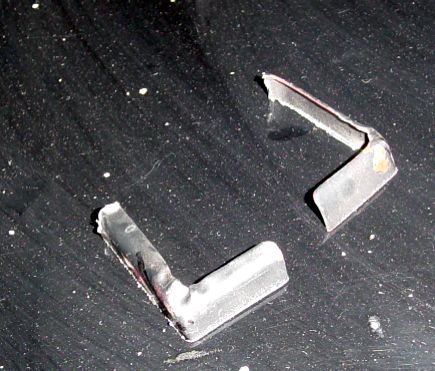
The '87 upper bumper mount isn't as long as the one on the '84. To allow the mount to bolt up properly, about 1/4" of material had to be cut from the ends as outlined in green. I used an angle grinder with a cutoff wheel—took about 10 seconds each side.
image: Bumper Mount Modification
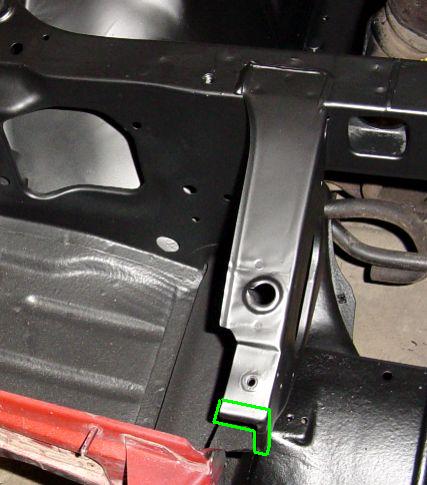
This is what was removed. The upper mount bolted right up with this material gone.
image: Material Removed from Upper Mount
Aside from those points, all other mounting points appear to be in the appropriate spots:
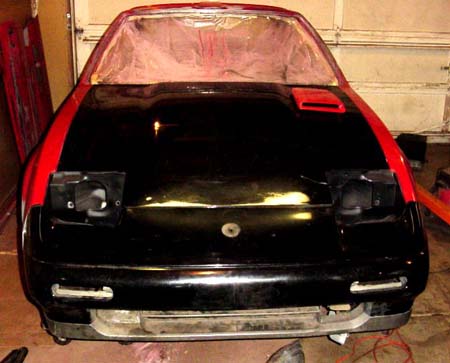
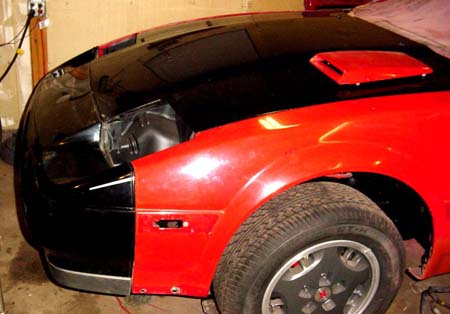
Here is what happens if you don’t trim the ends of the top mount and use the '84–'86 hood and headlights:
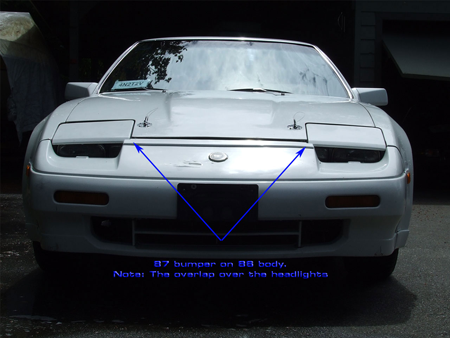
Headlamp Fitment
From what I've read, the headlamp buckets should simply require drilling a couple of new holes and bending the base of the bucket. For some (perhaps '86 model year), this is the case. Unfortunately, for me, it was substantially more involved—but the result looks factory.
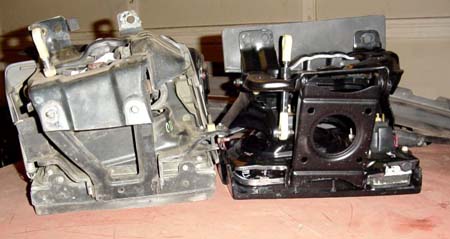
Here is a side-by-side comparison of the '87 and '84 style headlamp buckets. They are laying headlamps down—the '87 is on the left. Notice the '87 bucket is substantially deeper than the '84.
image: '87 vs '84 Headlamp Buckets
As you might guess, when the '87 headlamps are installed on the '84, they won't recess—the '84 bucket is not deep enough to accept the '87 assembly.
image: '87 Headlamp Not Recessed
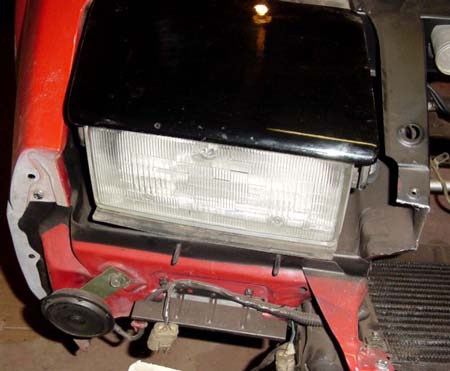
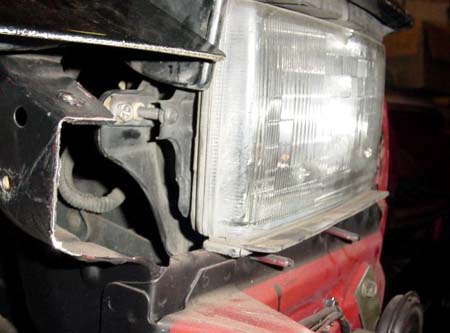
image: Another Angle - Not Recessed
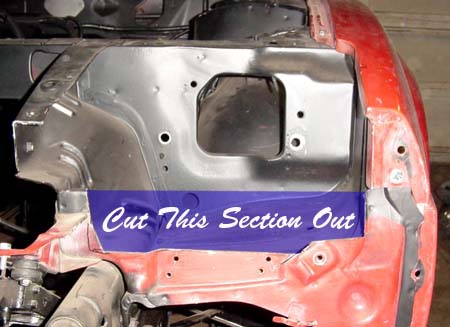
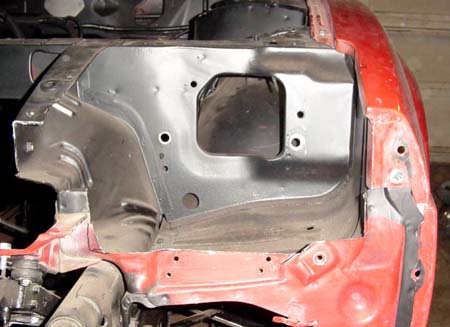
To fit the '87 headlamp, the front metal piece must be removed. Based on the height the headlamp stuck up above the hood, approximately 3" of material had to be cut out. I used a 4 1/2" angle grinder with a 36-grit cutoff wheel—disheartening, but necessary!
image: Marked Area for Cutting
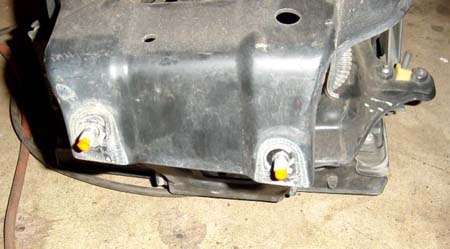
The '87 headlamp mounts to the car differently than the '84. There are two studs on the bottom of the headlamp that mount through the bottom of the bucket. These must be drilled out to fit the '87 headlamp. To do this, I painted the studs with fluorescent paint and installed them, then drilled holes where the paint marked.
image: Studs Marked for Drilling
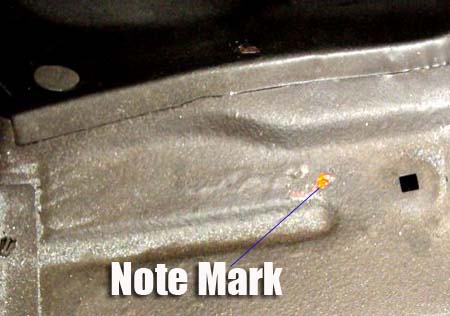
I had to drill a couple of holes to get the left stud to line up. Additionally, I had to elongate the holes until everything adjusted correctly.
image: Elongated Mounting Holes
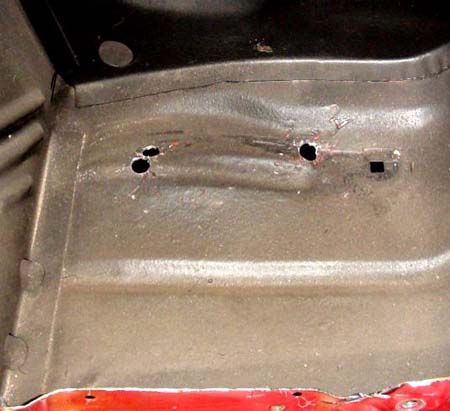
The '84 headlamp bucket is too deep on the inner edge, causing the headlamp to tilt toward the radiator. To fix this, the bottom of the bucket must be bent upward by approximately 1–2". I used a body hammer with good results.
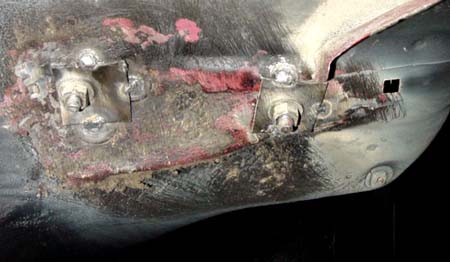
Once the holes were drilled and the bucket bent, I test fit the headlamp. The brackets that mount the bucket to the radiator support were too short—the bucket stood about 1/2" above the hood. To fix this, I cut off the brackets with the angle grinder and welded on replacements from 1/8" mild steel.
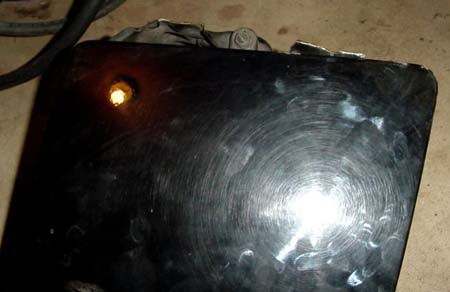
image: Replacement Bracket Welded
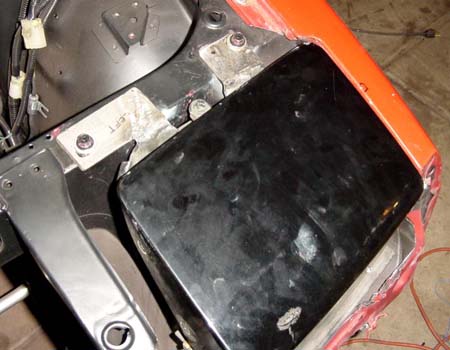
With everything modified, I then spent about 2 hours bending, tweaking, and adjusting to get the headlamp to sit flush and properly angled with the hood. When everything finally lined up, I tack welded spacers to each mounting point so the headlamp would align again when removed.
image: Final Mounting Adjustments
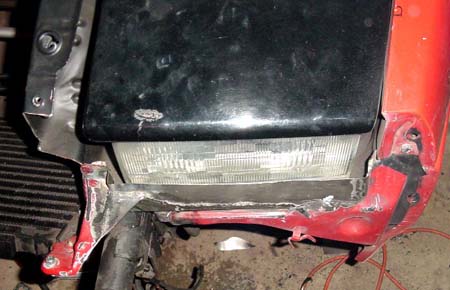
Once installed and aligned, I rebuilt the front metal piece using 22-gauge steel, moving it outward about 3/4" from the original. (The funky-looking black stuff is just a weird reflection.)
image: Rebuilt Front Metal Piece
When everything fits as desired, brush all welds and seams with 3M's brushable seam sealer. Re-undercoat the base of the bucket and repaint the radiator support panel, bucket sides, and new bucket frame to match the underhood black.
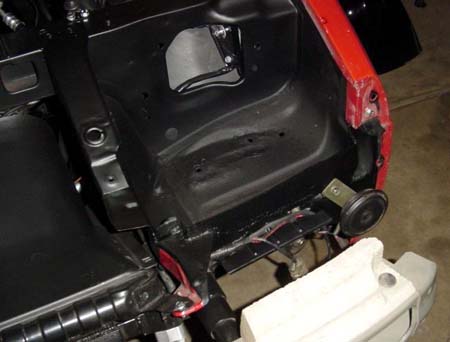
And the final results: This took me about 4 hours nonstop. Hopefully, the passenger side will go even faster with the experience gained!
image: Final Installed Result 1
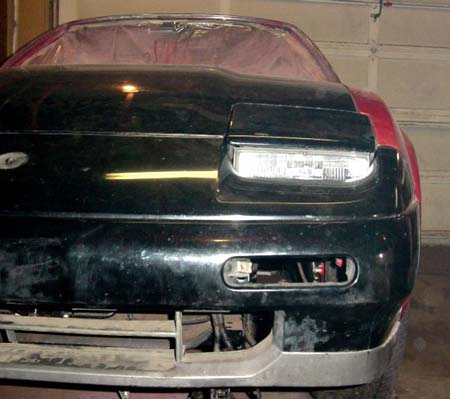
image: Final Installed Result 2
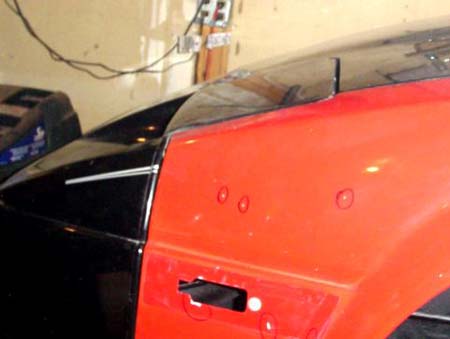
Final Steps and Thoughts
To finish the installation, all welds will be coated with 3M's seam sealer and all surfaces painted black. The undercoating will be reapplied to both the inside and underside of the headlamp buckets. The headlamp buckets will be rebuilt to like-new condition, just as with the originals. Additionally, I plan to use aftermarket foglamps—these offer substantially higher quality for less than replacement units from the dealership.
Here are a few pictures taken just because... hopefully, they'll motivate you either for or against this conversion if you're considering it but not sure you want to take it on:
image: Conversion Complete - Front Angle
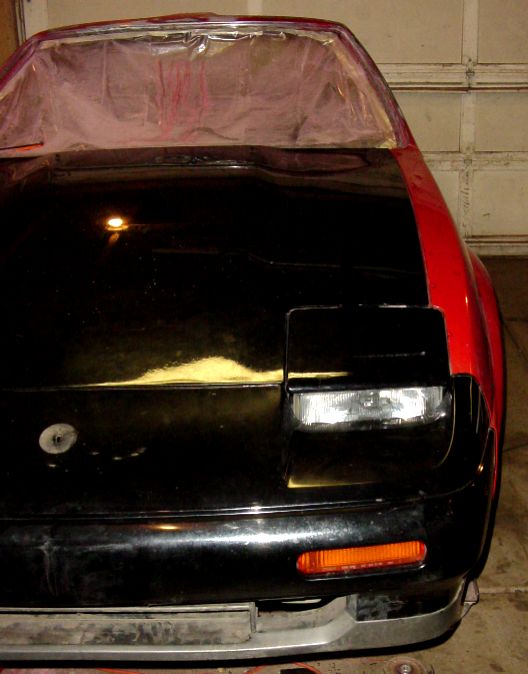
image: Conversion Complete - Side View
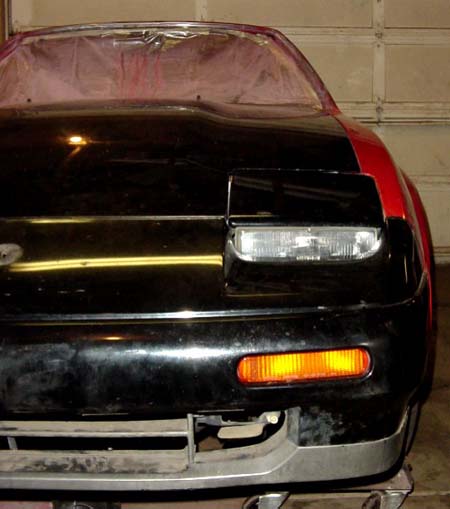
image: Conversion Complete - Detail
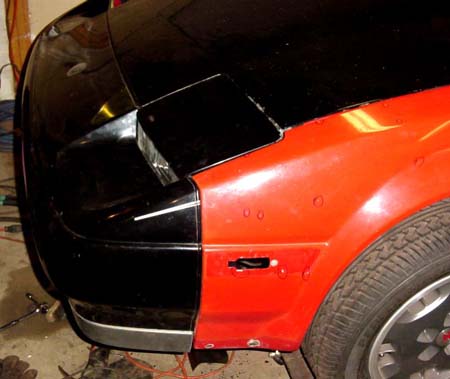
The grey strip along the bumper will be continued along the fender, using strips formed from fiberglass.
Sources Used
- Writen by: Radare